Announcement

Collapse
No announcement yet.

Announcement

Collapse
No announcement yet.

Let’s co-build a modern IDX Pro: STM32F411 core + ESP32 UI - hardware collaborators wanted

Collapse
X
 
  • Filter
  • Time
  • Show
Clear All
new posts

  • Let’s co-build a modern IDX Pro: STM32F411 core + ESP32 UI - hardware collaborators wanted

    Hi all,

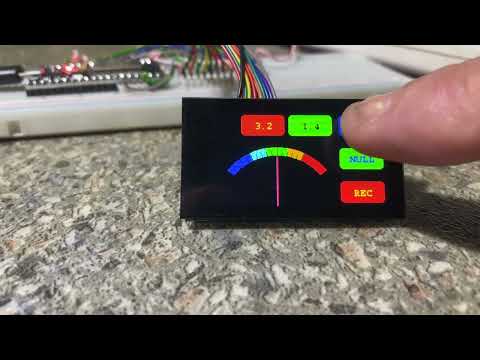
    I’d like to kick off a hardware-first collaboration to build a modern IDX Pro–style detector: keep the proven analog front end, replace discrete timing and panel pots with a STM32F411 (real-time timing/ADC) and use an ESP32 for UI/connectivity. I’m stronger on firmware than analog; I have basic electronics skills and have successfully built a PI Polonese in EasyEDA. I’m hoping the community can lead the hardware/analog side.

    Goals & scope (hardware focus):
    • Power: 3S Li-ion + BMS → +5 V (analog), 3.3 V (MCUs), and a small charge-pump for −5 V.
    • TX path: STM32F411 timers drive TX/BLANK/SAMPLE (µs), gate driver → MOSFET → coil.
    • RX path: LF357 integrator + analog switch (reset/hold), TL071 as post-amp/threshold to audio/MCU.
    • Digital instead of pots: low-cost PWM+RC (or I²C DAC) → op-amp buffers to create stable Vref controls for THRESH / SENS / GB / DISC.
    • Demod options:
      • Start with analog sync demod (CD4016/4066-type) phase-driven by MCU.
      • Consider digital lock-in on the STM32 later if ADC/layout allow.
    • UI choices:
      • Phone app via ESP32 (Wi-Fi) with sliders and live telemetry, or
      • On-device display (e.g., ST7789) + rotary encoder + buttons.
    • Nice-to-have: Bluetooth headphones (ESP32 A2DP source or a dedicated low-latency BT audio TX tapped from the audio stage).

    Where I’d love community input (priority):
    • Op-amp choices, analog switch/demod approach, and stable ±5 V supply.
    • Coil design (diameter/inductance/winding) for general coin hunting.
    • Gate driver & MOSFET selection, snubbers, EMI/grounding/layout (star ground, guarding around integrator).
    • Filter constants and best tap point/leveling for Bluetooth audio.

    Plan: assemble and validate the hardware first; after we have a stable front end and power section, I’ll begin firmware timing/ADC tests on the STM32F411 and integrate the ESP32 UI.

    If this direction sounds good, I’d appreciate part suggestions, schematic pointers, and layout tips so we can converge on a solid hardware baseline. Thanks!

  • #2
    My proposal is; built detector on ESP32C6 only, to start a two-channel generator code is needed, one square waveand the other sinusoidal with adjustable amplitude and phase.

    Comment


    • #3
      I have this one from recently: https://www.waveshare.com/wiki/1.9inch_Touch_LCD

      Comment


      • #4

        Comment


        • #5
          Hi everyone,

          For a start, I was thinking about modifying an IDX Pro. The idea is to keep the analog front-end from the TX/RX coil and the CD4066, and then feed the X and Y signals directly into a microcontroller.

          Just to repeat: I mainly need help with the hardware part. For the software side I can handle it myself.

          I have drawn this circuit in EasyEDA (see attached schematic), but I believe it still needs some adjustments. For now I’m using an Arduino Nano in the design, simply because it’s easy to test with. But if the hardware works fine with Arduino, I can later move to an STM32F411, which is more powerful and robust.

          My main question: What should be modified around the MCP6022 stages in order to get a clean input for the microcontroller ADC?
          If we solve this part, then I can add the display, rotary encoder, audio output, and more.

          Let’s build a real beast of a detector together
          Attached Files

          Comment


          • #6
            Hi guys! I was out of hobbies for like 5 years as we have more children, but I am back in the workshop.

            1) I would not use arduino anymore. It has small memory, its slow... but its a good way to start. Its good to control chicken doors automatically (even there I am using ESP32), but real time processing and graphic display is too much for that little buddy.
            I like hysteresis like hodograph, watch my attachment with I believe latest program I used on atmega1284 (was not able to keep enough samples in memory on atmega 328 so I took better, atmega 1284. In schematics is written 644, but i used bought 1284. There are no comlete boards as far as I know so I build my own with crystal, encoder and COG display) Schematics and arduino program in attachment.

            https://www.youtube.com/watch?v=NGDUdgln_oY&t=4s

            Video is from first prototype, probably min signal set too high as it does not redraw each signal properly. It has been solved and device worked as I wanted, but COG display is lazy in cold so i wanted to swap to TFT. No further videos taken and device is already disassembled to rebuild with newew ucontroller and display.

            2) STM32F411 is fast, huge memory, 12bit DAC... and its under 5$. I am developing real time hodograph on STM32F411 with 240x380 TFT now. It somehow work, but need to tune it further... I would like to keep it as addon, its possible to attach onto any analog detector with X & R...

            Good luck!
            Tomas
            Attached Files

            Comment


            • #7
              Switching to a better processor sometimes seems scary, but in fact it is not.
              I've been putting off switching from the Atmega328P to something better for a few years because I thought things would be more complicated.
              However, switching to ESP32 was easier than I expected.
              What is fundamentally good is that some old problems are much easier to solve with better processors.
              The ESP32, for example, handles complicated DSP algorithms and filters very easily.
              I'll give one slightly comical example at a time.
              At a time when I absolutely needed it, in 2018 I failed to do a single task with the Atmega328P the way I wanted.
              This summer I did that same task easily with ESP32.
              But in parallel, it gave me the idea to try a different approach with the Atmega328P and I managed to do the same task very efficiently with the Atmega328P too!? Now that it doesn't matter so much to me.
              What is the message? Don't be afraid to move on to something more powerful. New horizons are opening up.

              Comment


              • #8
                Originally posted by Hyena View Post
                Hi guys! I was out of hobbies for like 5 years as we have more children, but I am back in the workshop.
                Good luck!
                Tomas
                the schematic page is blank

                Comment


                • #9
                  Originally posted by Hyena View Post
                  ..... Schematics and arduino program in attachment.
                  Hi,

                  which Electronic program have you used to draw the schematic? Or better would be to post an image of the schematic as png, gif or jpg etc. or as a pdf? Then it is easier for people to study your circuit.

                  Comment


                  • #10
                    Its in ExpressSCH, attached BMP in zip

                    One MCP602 is enough for X & R. I just wanted to experiment with more so added another one.
                    Attached Files

                    Comment


                    • #11
                      Slowly getting somewhere with STM32F411 & 320x240. Its piece of ferrite, old forged rusty nail, small silver, €, bigger silver. We already have the saddle, now we need to get the horse.
                      Right bottom is battery voltage
                      Attached Files

                      Comment


                      • #12
                        Very nice photos. What's the range for the coins?
                        I'm considering building something similar; I have this 1.9-inch display.

                        Click image for larger version  Name:	image.png Views:	0 Size:	273.2 KB ID:	442206
                        Can you help to modify the program for it ?​​

                        Comment


                        • #13
                          I’ve built an IDX Pro metal detector, and it’s working very well. Now I want to add a 2-tone audio module to the circuit.

                          I have the original IDX Pro schematic and the 2-tone module schematic, and I have combined both circuits into a single diagram in EasyEDA. Before I start working on the PCB layout, I would like to ask for your help to confirm that my combined schematic is correct.

                          If you notice anything wrong or anything that should be improved before I continue with the PCB, please let me know. Your feedback would help me a lot.

                          Thank you!

                          Comment


                          • #14
                            Hello,

                            For comparison, it would be good to see the other two circuit diagrams as well. How else are we supposed to see the differences if they exist? Makes sense, right?​

                            Comment


                            • #15
                              I’ll upload the two original schematics as separate images:
                              1. Original IDX Pro schematic
                              2. Original 2-tone module schematic

                              This way you can compare them with my combined version and check if everything matches correctly.

                              Thank you for pointing that out, and I appreciate your help!

                              Comment

                              Working...
                              X