Can you check the DC voltage on all pins, as described at the bottom of this page:
Can you try with a simple coil diameter 20 cm - 26 turns ?
Also: keep the coil away from noise sources - like the PC power supply.
When I try the detector indoors, I put the sensitivity voltage - with the potmeter - to 1V or less.
-
already and checked and changed, the sense of zero. bs170 to 2n7000, the result is the same. LM 318 also changed, or something has not changed.Leave a comment:
-
Noob way.... check ur bs170, there is some with reversed pin, check your lm318, when the ic is defect, the md will not work as it should.Leave a comment:
-
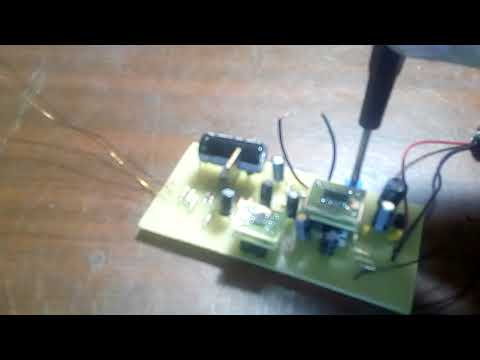
here is a trial assembly. and does not work like the others. power connected different. power supply to 15v, power supply from computer 12v. accumulators 3х18650. and no changes in the work. sensor 100mm 40 turns shielded with aluminum foil. without shielding it works the same way. all the details correspond to the scheme, or anything not changed. what could be the reason?
Leave a comment:
-
Thanks!
My second order of BS170s finally arrived in the post today - it looks like the original order may have gone astray
Now to concentrate on making the waterproof housing for it all.Leave a comment:
-
Is that a surface mount transistor I see? That's hilarious. Nice job!
Leave a comment:
-
Sounds great. Any pictures?
Like to see DIY with available materials.Leave a comment:
-
I have just got my Pickini up and running (bare bones only - no case yet) and would like to thank Bernard for the work he has done in designing a great little detector project.
In-air tests so far indicate that the depth is good and should be more than adequate for my intended use as a fully waterproof snorkelling detector - the case is a work in progress at the moment.
The PC board was homemade using uv dry transfer film and etched with ferric chloride. It turned out pretty well considering I guessed the exposure time using very diffused sunlight and a paper laser print sprayed with coconut oil to make it translucent. Drilling the holes was, as usual, a PITA!!
The board was populated with a mixture of second-hand capacitors and most of the other components from China which were nearly all checked with a component tester before use - I'm still waiting for the BS170 to come but ended up using a salvaged surface mount version (marked as 702) with 'spider legs' attached. It looks odd but seems to work OK! Also, I used a 2N2222 in place of the BC549
Programming the PIC was rather stressful as I had not used the Pickit3 very much, and not for some years, but thanks to all the info here on the forum it was successful first try!
The coil is made from enamelled copper wire (recovered from a microwave oven transformer) wound around a flower pot as the former then wrapped with nylon fishing line, paper masking tape, packaging foam strips, pvc electrical tape then copper foil tape as a shield.
When first tested the detection distance was woeful until I discovered I had used a 1k resistor instead of a 1m across the LM318 (DUUUH!)
Anyway, I am more than happy with the whole thing.
Thanks again Bernard!Leave a comment:
-
I think that this option of the button regulator can be used instead of a potentiometer. without any unnecessary controllers and chips. although the controller would take up less space 10 times. you need to try everything.
or Digital potentiometer X9C103S or ds1669Leave a comment:
-
Happy new year and happy hunting in 2018 !
The sensitivity in static mode is indeed a little less than in dynamic mode to more accurately pinpoint the target.
Make sure that you keep the coil well away from the target - preferably in the air - and then press the pinpoint button.
The detector will then take the last readings before pressing the button as reference and not update these readings anymore while in pinpoint mode.
Best regards,
- BernardLeave a comment:


Leave a comment: