If this is your first visit, be sure to
check out the FAQ by clicking the
link above. You may have to register
before you can post: click the register link above to proceed. To start viewing messages,
select the forum that you want to visit from the selection below.
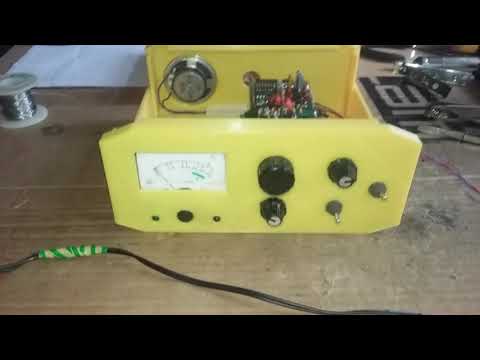
How nice it looks! That 3D printer is a really cool gadget
It works very nice with that little coil, Im curious how it would work with a nice 24cm basket coil.
hi ivconic. How are you doing. Will this pulser separate black and non-ferrous metal?
Don't know yet, not finished "discriminator" board yet.
It is the additional pcb that goes over the "motherboard".
What you can see on Youtube video is only "motherboard" in action.
Once i finish the "discriminator" board; i will know.
But from previous experiences with Pulse Star II Pro; i know that discrimination is not reliable at those machines.
I made it not because of discriminating capabilities but because it is extremely deep and agile detector at the same time.
Agile in a sense of much faster reaction on targets than... let's say Delta Pulse and similar deep PI detectors.
Very fast, ultra deep, stable and very simple in handling.
...
I am totally choked by flue last couple days, so my work will be delayed...
Chain smoking is not helping at all...
Maybe i shall try whole bottle of brandy per day...!?
Awesome enclosure desing!
You must have a perfomant calculator to draw these 3D models . How greath is the durability of the 3D printed plastic material?
It can be great if prepared well. If "sliced" well.
Kids in USA are making real shooting guns from filament.
3D printing is not a joke; it's almost a "science".
Needs certain learning curve and lot of practice.
Awesome enclosure desing!
You must have a perfomant calculator to draw these 3D models .
How greath is the durability of the 3D printed plastic material?
This would be third attempt to draw enclosure for Pulse Star.
It is not that hard to draw 3D objects. But it is very tedious to make it that right so parts not to print for days.
First two attempts gave me "~2 days" approximated duration of printing some parts!!! Hell no!
So i had to "break down" larger parts to smaller. Lot of trade offs.
Now this is more acceptable respecting the printing duration.
Panels will print within 6-7 hours each, upper and lower sides within 9 hours each! LOL!
This of course if we are alright with acceptable printing quality and moderate smooth surfaces.
Time is no problem, good things are always kept for last.
I hope this project will gain interest so people come here and dicuss about it.
Discriminating PI sounds lovely, even more if I think of the deeply buried metalic artefacts that could be found with it.
Only schematic that i have is from some Turkish forum. Full with mistakes.
Luckily i got original pcb boards and i made it respecting those.
I intend to draw most proper schematic, relaying on present state at working pcb.
But it would be pretty tedious job... i will need some time.
As you maybe noticed; i used only "motherboard" so far.
Also i plan to populate "discriminator" board too.
Other 2 boards (front and rear panel) i don't intend to use.
Original charging part (on rear pcb) is obsolete and total overkill.
I have much simpler and easier charger on my mind.
Front pcb also is not suitable for me; due some components and volumes that i can not obtain.
Instead i will draw my own front panel pcb with components that i can obtain here.
Only "motherboard" is relevant. And maybe "discriminator", not sure yet, will see soon.


 .
. 


Leave a comment: