Alternatively you could build a small CNC machine to mill out the PCB directly.
-
i have been thinking about this, if inks are now available that are etch resist, what you all need is an older style of printer, called a bubblejet printer, its basically like an inkjet, but has ink tanks instead of cartridges, infact some canon and epson printers sold as inkjet are in fact bubble jet type, its just the tanks are small and removable like cartridges, this type of printer still turn up cheap here, very often a3 poster size, any printer that takes ink from a tank will be better here, as there is no electronics on the tank/cartridge.
a lot simpler too but would do what you are after, but you have to have etch resist ink.
infact i threw out an a3 size bubblejet printer last year, as i could no longer find the RGB kind of inks(CMY are no good for them print wise), but for this it would not matter, as long as it prints the traces properly it would work.Leave a comment:
-
I see, you are talking about baking paper, yes it works.
We use only the Bakery release paper type here in Oz.
Parchment paper
Modern parchment paper is made by running sheets of paper pulp through a bath of sulfuric acid
(a method similar to how tracing paper is made) or sometimes zinc chloride.
This process partially dissolves or gelatinizes the paper.
This treatment forms a sulfurized cross-linked material with high density,
stability, and heat resistance, and low surface energy – thereby imparting good
non-stick or release properties.
The treated paper has an appearance similar to that of traditional parchment,
and because of its stability is sometime used for legal purposes where traditional parchment was used.
Bakery release paper
The stickless properties can be also achieved by employing a coated paper,
for which a suitable release agent — a coating with a low surface energy and capability
to withstand the temperatures involved in the baking or roasting process —
is deposited onto the paper's surface; silicone (cured with a suitable catalyst) is frequently used.Leave a comment:
-
Just thought I should mention this:
For the heat/toner transfer method, I read somewhere on the 'net that parchment paper works very well. More so than any of the glossy papers because it requires less pressure to make the toner stick. I have not yet tried this. But I plan to for my next PCB build.
Cheers!Leave a comment:
-
-
Hi
I started hacking a Epson C80 earlier last year but left it on hold because there is alot more involved with mine, and another reason Ive not been that eager to carry on at the moment is inks.
I belong to a forum that specializes in just that, hacking printers for PCB purposes and theres been some very good results but often its getting the inks that will do the job without clogging up the jets Anyway on another note, push forward with it and let me know how you get on because its all about new ideas trials and errors.
RegardsLeave a comment:
-
Hi everyone,
Not sure if Andreas still posts here, but what he was referring to his initial post was modifying a existing printer to accept the right thickness PCB+feeder plate to print direct on to the PCB instead of paper then place in acid to etch.
I just started to modify a surplus Canon printer after seing a Youtube video which someone did the same and produced boards to accomidate up to SMT format. Dont have a link to it, but you could do a search.
The process is you first print on rear feeder plate to see where you will place the blank PCB. Then you tape the PCB on the rear plate where the outline is established, heat it up with a hot air gun to allow ink to stick better and re-feed it through the printer to produce the track layout. Reheat the board again so the ink dries up well and then place in the etching solution.
Very simple process with great results if you can modify the printer to accept the right thickness.
Not all printers will do due to mechanical restrictions and some require the scanner bed connected due to fault symptoms diagnosis restricting proper operation.
The one i have here still works without the scanner bed so even though it detects that it is not connected....it still works. Not many do, but this model Canon does
There is alot to modify, but will see if the effort is worth it. Slow project, but on the to do list.
Cheers Sid
Leave a comment:
-
Hi everyone. Great info here!
I am about to make my first MD, and I've reached the part where I have to manufacture the PCB. I purchased a few sheets of transparent foils for the press and peel method, called TES 200. Anyone used them before? I will try them out today and will get back with the results.
Regards,Leave a comment:
-
Hi, It is very easy to purchase hydrochloric acid in Australia. Any Bunnings store has plenty in stock and it is really cheap (about $13 for five liters or $5 for 500ml) and it has perfect quality for PCB etching.
I was also able to buy 500ml H2O2 concentration 45% or 50% from a hydroponics shop, which now closed down, for only $10. I enquired with some other hydroponics companies, but most didn't bother to answer my emails.
But on ebay you can still buy H202 35% but it is much more expensive ($60 for 500ml, food grade).
If people decide to use this mixture, they need to dilute it with water, probably in a 1:3 to 1:4 ratio. I used the same solution for over one year, just by adding a bit of H2O2 as required and sometimes a bit of HCl.
Recently I moved from PressNPeel blue sheets to Kinsten presensitized and a UV Light board made with over 200 UV leds. Results are extremely good. In Australia, sun is so rich in UV that probably exposing the board for 5 minutes in the sun will be enough for presensitized PCB.
Regards,
Nicolae
Originally posted by Pete the Builder View PostLeave a comment:
-
Have a look at http://techniks.com. They have a great explanation of how the process works (it also comes printed with their packs, or at least it used to).Originally posted by golfnut View Post
It's basically like a t-shirt transfer, except instead of a t-shirt, you use a blank PCB!
It's not a difficult process at all, but you do need access to a laser printer. Any photocopy place should be happy to print off a design for you if that's a better solution. I bought a new HP laser printer at **** Smith's for AUD$78.00, so I'm sure other countries can find even cheaper bargains. It actually costs more for toner than it cost for the printer, but it then became a throw-away printer!
Basically, you print the 1:1 PCB design on the special paper. You then take that paper and use heat and pressure (from a clothes iron is fine) to make the toner on the sheet stick to the bare copper PCB surface. Then you etch the board. Then (I assume) you win the Nobel Prize! (I mean, it all sounds so easy, but real life physics gets in the way!)
I had a really bad run of board designs, then I found out I'd bought a refilled toner cartridge. So I tried 3 different toner refillers (price didn't matter), and I got the same problem with each. At the time, it was a terrible waste. So I don't care how great a toner refill process is, genuine toner will make your life so much easier you could kiss me! Please don't kiss me. Just use good quality toner, and you'll figure out the precise temperature and pressure you need to use. Then stick with what works for you.
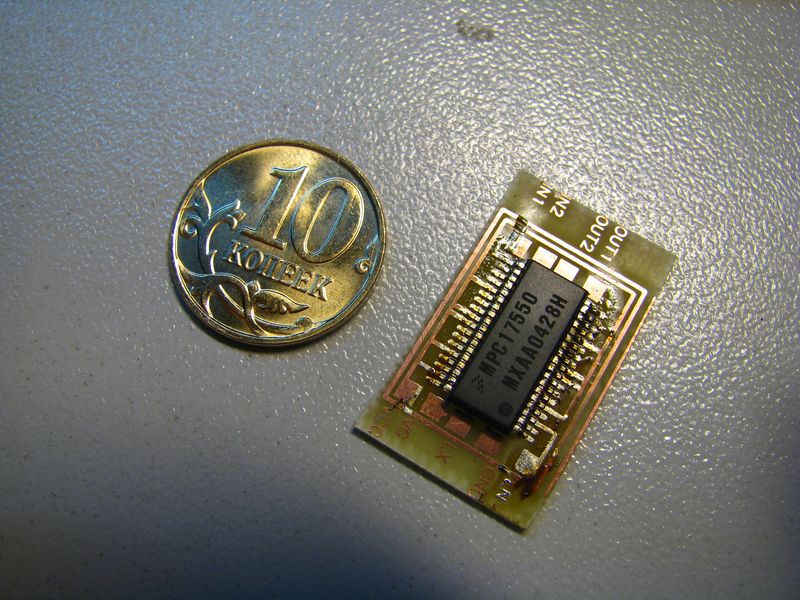
You can easily etch tracks between IC pins, and if you're really keen, you can print and solder nearly any modern IC, certainly down to 12.5 mil pitch with a 600dpi printer. Soldering those suckers is another art in itself, but it's absolutely possible to print, transfer, and etch at least as clearly as your laser printer allows. With care, you can hand-solder LQFP packages (the ones with no leads at all).
BTW, I like the idea of HCL and H2O2... But in Australia, that's not easy for the average Joe to find... at least, not good quality items! We can easily get brickies' cleaner (which is about 17% HCL, but it contains many impurities), but anything that I'd consider usable in etching would have to be ordered from a specialist chemical company. Unless someone's tried cement cleaner?
Jaycar (and I think Altronics) still stocks a great etching tank kit, consisting of an etching tank (they still call it a 'kit' though). You can buy a small air pump (1-2 cu. ft/min is fine) at any aquarium place, and since the acid doesn't come into contact with the pump, it should be fine. You do need to compress the fittings though, the plastic air inlet is usually a bit dodgy on those plastic tanks.
For a reasonable cost, you could get an etching system that should produce pretty much any board you care to design, is easy to clean and pack away, and it's a lot of fun figuring out how to defeat the bubbles sticking to your pad holes in the tank... What fun for everyone!
Sorry to go on about it. it's just such a reliable and repeatable process... You can turn around a design in under 20 minutes, screen to fully etched board (18 minutes is my record, but that was with fresh everything - PnP film, toner, etchant, and PCB).
I hope this helps and doesn't confuse anyone!
PtBLeave a comment:


Leave a comment: