If this is your first visit, be sure to
check out the FAQ by clicking the
link above. You may have to register
before you can post: click the register link above to proceed. To start viewing messages,
select the forum that you want to visit from the selection below.
This is what i am talking about; most tricky part:
That's what gave me most of the headache and i was pi..ed of whole last night, trying to make it like that.
I failed.
This enclosure is real piece of work. But you can realize that only if you try to replicate it.
Original designer of this enclosure (mad man probably) is now laughing hard, reading my post.
I will not be completely satisfied until i do it properly.
Very nice! Ivconic, you are certainly dedicated to your craft, the box looks superb!
I saw this tesoro box on another forum. There are also some files associated with it. Maybe these pics are already here somewhere on the forum, I don't know.
I'm not sure if it was 3D printed or molded. Or if it is an original box, but it looks a little strange, is there a bandido 3 uMax?? No. I guess he got a little creative.
That's splendid done enclosure! I really like it!
It doesn't look like 3D printed?
Before i even made first attempt; i tried to find any 3D files for Tesoro box over the internet. But i found nothing.
You've really got to grips with the 3D printing.
Well done.
How long did it take to print?
~ 10 hours all 3 parts (enclosure, front panel and battery door).
It looks very nice... but i am not satisfied totally.
I couldn't managed to make 100% exact copy.
My 3D drawing skills are modest and also i am doing all in Tinkercad, which is online, sometimes lagging, sometimes slowing down, not very rich with options.
So i didn't know how to draw properly the angles for the back side. Starting from front side there is slight decaying angle up to the back side. Horror!
I am having original Bandido II uMax in front of me, looking at it all the time, measuring it... and it makes me crazy all the time.
After whole day spent on attempts; i was not able to make angled back side. Or simply there is no way to do that in Tinkercad, can't tell.
So if you pay attention on my photos; you will notice that back side is not angled but straight.
That's one problem and another problem is as i mentioned; melted plastic is tricky and jitters, so you can not completely rely on proper drawings and math.
Usually it takes few prints to "calibrate" computer math and dimensions which are properly done in software with reality. Usually in reality there is mismatching, sometimes for 0.2mm and more.
For example the battery door from photo. It perfectly matches in Tinkercad but when printed; there was unbelievable mismatch, so i took sharp blade and had to spend 20 minutes more to correct that part to fit and slide into enclosure "channels" easily.
Same story with front panel.
I am still learning through the work and lot of trial&errors.
That's because i am layman.
Educated and experienced mechanic engineers will know and tell you that each type of mechanical machining is having it's own rules and "secrets".
Each machined material is having own tricks and traps, in form of various jitters when processed.
But with metal and wood you can always rely on some standard reference in tolerance and calculate it in advance.
In melted plastic case; it is much more difficult and unpredictable to know tolerance in advance.
So it always ends up with several attempts and trial&error method.
I have Autodesk Fusion 360 and 123 Design too. But i am not skilled yet with those software. Whenever i have time; i follow online courses for those.
By now Tinkercad is all what i can work with.
Very nice! Ivconic, you are certainly dedicated to your craft, the box looks superb!
I saw this tesoro box on another forum. There are also some files associated with it. Maybe these pics are already here somewhere on the forum, I don't know.
I'm not sure if it was 3D printed or molded. Or if it is an original box, but it looks a little strange, is there a bandido 3 uMax?? No. I guess he got a little creative.
I really like the Tesoro housing design, real metal detector housing!
I spent whole day yesterday in small corrections and adjustments.
Than i printed prototype. Not finished yet.
There are several very small (but important) details yet to be corrected.
But i had to print it; to see it "alive" and to additionally prepare corrections.
In 3D printing you can not rely that you will get what you see on pc monitor; since melted plastic is behaving sometimes different than expected.
Usually it takes one or two printed prototypes to get perfect finish.
Lot of hard labor, lot of trial&errors.
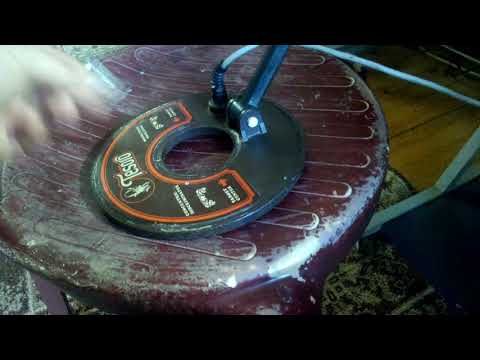
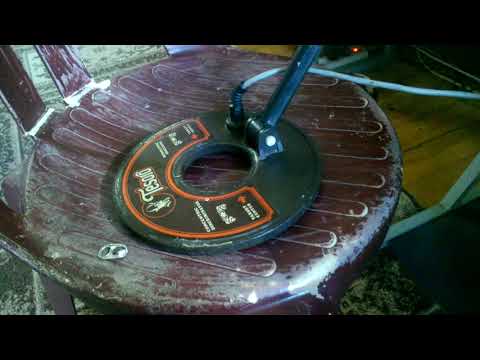
Here is what i have done so far:
I wanted to buy a cheap Compadre from ebay but it was sold after. There are severall mods for it mainly battery and trimmer change mods.
SilverDollar posted his results with the Bandido and he said it consumes only 15mA . Maybe you should try the battery mod, 9v battery is very handy but cant deliver "Power".

 . Maybe you should try the battery mod, 9v battery is very handy but cant deliver "Power".
  .
.


Leave a comment: