Announcement

Collapse
No announcement yet.

MANUFACTURE PCB

Collapse
X
 
  • Filter
  • Time
  • Show
Clear All
new posts

  • kt315
    replied
    Originally posted by sunrisetnut View Post
    Hi everyone !
    This book is very good and i really want to get it but now the file expired so please post it again.
    Many thanks
    take it easy! enjoy!

    http://depositfiles.com/files/oqdu1qo1u

    Leave a comment:


  • sunrisetnut
    replied
    Hi everyone !
    This book is very good and i really want to get it but now the file expired so please post it again.
    Many thanks

    Leave a comment:


  • Cyclonite
    replied
    Printed Circuits Handbook - 6th Edition - By Clyde F. Coombs (2008 )


    * Publisher: McGraw-Hill
    * Number of Pages: 1632
    * Publication Date: 2008
    * ISBN-10/ASIN: 0071467343
    * ISBN-13/EAN: 9780071467346
    * Binding: Hardcover
    * Format: PDF
    * Size: 15.81 MB

    Description:

    The World's #1 Guide to Printed Circuit Boards. Now Completely Updated with the Latest Information on Lead-Free Manufacturing!

    The best reference in the field for over 30 years, the Printed Circuits Handbook equips you with definitive coverage of every facet of printed circuit assemblies - from design methods to fabrication processes. Now completely revised and updated, the Sixth Edition presents the latest information on lead-free manufacturing, including lead-free PCB design and fabrication techniques, lead-free materials, and lead-free reliability models. The new edition also explores best practices for High Density Interconnect (HDI), as well as flexible printed circuits.

    Written by a team of experts from around the world, the Sixth Edition of this renowned handbook contains cutting-edge material on engineering and design of printed circuits fabrication methods…assembly processes… solders and soldering…test and repair…waste minimization and treatment …quality and reliability of printed circuit processes…and much more. The updated Printed Circuits Handbook provides you with:

    * Unsurpassed guidance on printed circuits - from design to manufacturing
    * Over 500 illustrations, charts, and tables for quick access to essential data
    * New to this edition: New coverage of lead-free PCB design and manufacturing techniques, lead-free materials, lead-free reliability models, best practices for High Density Interconnect (HDI), and flexible printed circuits


    Inside This State-of-the-Art Printed Circuits Guide

    • Introduction to Printed Circuits
    • Engineering and Design of Printed Circuits Fabrication Processes
    • Assembly Processes
    • Solders and Soldering
    • Test and Repair
    • Waste Minimization and Treatment
    • Quality and Reliability of Printed Circuit Processes
    • Flexible Circuits


    Download (13.87 MB):

    Printed Circuits Handbook - 6th Edition - By Clyde F. Coombs (McGraw-Hill - 2008 ) 1633s - Including Bookmarks.pdf
    (15.81 MB)

    as

    Printed Circuits Handbook - Coombs (2008 ).rar

    iFile.it Download Link:


    or (optional)

    MegaUpload Download Link:


    No Password Required !

    Enjoy!

    Robert

    Leave a comment:


  • Cyclonite
    replied
    DIY PCB Manufacturing

    I had originally posted these links in an other thread. But as I am learning every day here on this lovely forum, I now see that these links will nicely blend in here into an on-topic discussion about DIY PCB Manufacturing started by @ANDREAS.

    And I would like to start off by adding a link to Mike Harrison's site, who gives excellent guidelines to those of you who would like to make there own High Quality PCB's.

    How to Make Really Really Good Homemade PCBs - By Mike Harrison:


    Note: And here you have the plagiarized copy of Mike Harrison's site by the "Indian Electronics Magazine" credited to a rip-off artist called Indrani Bose in PDF-format:

    How to Make Good Homemade PCB's - By Indrani Bose.pdf:


    DIY Printed Circuit Board Using Photo Etching Method:


    Transferring Your Design to a Board:


    DIY Printed Circuit Board (PCB) Manufacturing:


    DIY Printed Circuit Board (YouTube Video) - High Quality PCB at Home:
    DIY Printed Circuit Board: I want to share my personal experience with heat toner transfer method of making PCB. It's easy to learn for beginners and it delivers very good result for fair price. Do fast prototyping with fun! Enjoy! ... To get more info about LIQUID TIN see Sp…


    How to make PCB's at Home (Links):


    Easy Printed Circuit Board Fabrication - Using Laser Printer Toner Transfer:
    http://www.fullnet.com/~tomg/gooteepc.htm

    Laser printing of PCB's (Links):


    Direct to PCB InkJet Resist Printing:


    Hacking a Printer to Directly Print PCB's (a very comprehensive discussion going on here):


    DIY UV LED Double Sided PCB Exposure Box:


    Note: I use a single-bulb sun lamp through a 4mm window pane glass plate (regular glass is a UV-filter, and that's why quarts (Siliciumdioxide, SiO2) is used instead) at a distance of about 50 cm, and with an exposure time of about 5 minutes. This exposure time is rather long based on the intensity of the UV radiation given off by this sun lamps quartz bulb. But remember, regular window pane glass filters out a lot of the UV rays. Interesting however, is that a single-bulb sun lamp is a point source emitter, so you will have less underneath exposure deviation. What I mean is, if the light comes from one small spot light emitting source, then there is less indirect light that can penetrate via the PCB mask-film onto your photosensitive PCB from the sides at an angle. PCB traces generally become narrower when the PCB mask is struck by light at an angle.


    Making double-sided through-hole PCB's are by far the most problematic, and difficult to manufacture for the Home Brewer. Especially if you want the top and bottom layer through-hole galvanically interconnected too. And here you have a few interesting links to DIY through-hole PCB manufacturing, that lubricates this matter like a soothing ointment on a sore butt-hole.

    Acid Copper Through-Hole Plating:


    PCB Through-Hole at Home:


    Through Hole (EDAboard Thread Links):


    Good luck, and happy PCB manufacturing!

    Regards,

    Robert

    Leave a comment:


  • Qiaozhi
    replied
    Originally posted by Max View Post
    Hi,
    I used many of these ways... all have good and bad points... but just ONE is the method: photographic process.

    It's simple... do you need perfection ? If so, you need that way and no other.

    All the rest simply don't apply when you go for perfection...

    You just need these things to get started:

    1. a bromograph... though the word is complicate you can make one for less than 50$ and old flatbed scanner as example look here:


    2. some presensitized uv pcb boards ready to use

    3. a developer solution like these:


    you'll buy in reality a small bag with sodium salt to mix with water... and that's it.

    Then try, make errors and get used to the method... at the end you'll make perfect pcb, no matter of other things or methods, you'll beat all them at once.

    The only lack is that you cannot add a funky e.g. silkscreen to boards that way... but pcb will be absolutely perfect.

    Kind regards,
    Max
    Through-hole boards using rivets ... never seen that before - neat trick!
    Of course, the other way is to avoid vias altogether, and to use only component pins to swap sides.
    Interesting links.

    Leave a comment:


  • Max
    replied
    the best method

    Hi,
    I used many of these ways... all have good and bad points... but just ONE is the method: photographic process.

    It's simple... do you need perfection ? If so, you need that way and no other.

    All the rest simply don't apply when you go for perfection...

    You just need these things to get started:

    1. a bromograph... though the word is complicate you can make one for less than 50$ and old flatbed scanner as example look here:


    2. some presensitized uv pcb boards ready to use

    3. a developer solution like these:


    you'll buy in reality a small bag with sodium salt to mix with water... and that's it.

    Then try, make errors and get used to the method... at the end you'll make perfect pcb, no matter of other things or methods, you'll beat all them at once.

    The only lack is that you cannot add a funky e.g. silkscreen to boards that way... but pcb will be absolutely perfect.

    Kind regards,
    Max

    Leave a comment:


  • Carl-NC
    replied
    Originally posted by nick_f View Post
    I am also using the Press-n-Peel sheets with pretty good results. I didn't get good boards everytime, sometimes I had the iron too cold or too hot and other times I pressed too hard on the iron and the tracks flattened.
    I had the best results using a modeler's iron, the kind used for putting Monocoat on R/C planes. It is much smaller and easier to "feel" what's going on.

    - Carl

    Leave a comment:


  • nick_f
    replied
    I am also using the Press-n-Peel sheets with pretty good results. I didn't get good boards everytime, sometimes I had the iron too cold or too hot and other times I pressed too hard on the iron and the tracks flattened.
    What I want to point out is that I found what I consider to be almost a perfect marker to fix the errors on the board. I tried with the Sharpie Permanent Marker and I wasn't happy with it. But with the RED Staedtler Permanent Lumocolor (made in Germany, available in Australia), I got very good results. I haven't tried other colours.

    Regards,
    Nicolae

    Leave a comment:


  • ANDREAS
    replied
    ?

    Thanks you Kyle for your informationsBut I search a better method for make PCBs. If you see http://techref.massmind.org/techref/pcb/etch/c84-st.htm with this method we want only a simple inkjet printer and hot air for stampility draw. Don't neccesary photo paper... e.t.cI think is interest manufacture a inkjet from make pcb with silscreen e.t.c
    any idea?
    regards
    Andreas

    Leave a comment:


  • Kyle
    Guest replied
    Details

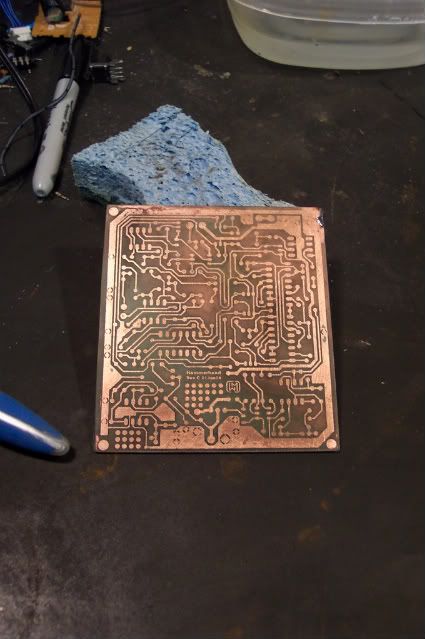
    I forgot to mention board preparation is key. For the Above board I first sanded the surface lightly with 150 grit paper, then cleaned it with alcohol (really nasty vodka), then I transfered the toner to it.

    Leave a comment:


  • Kyle
    Guest replied
    Toner Transfer

    I have used the Toner transfer method with photo paper a few times. The trick is lots of heat and lots pressure.

    I did it with the Hammer Head board and then used electrolysis. The cathode end was wrapped in a salt water soaked cotton ball and brushed across the board. This worked pretty darn well but was a bit slow. the biggest thing is you can not just chuck it in the tank and let it etch, it will eat your board up.

    Next time I most likely will just buy ferric chloride.

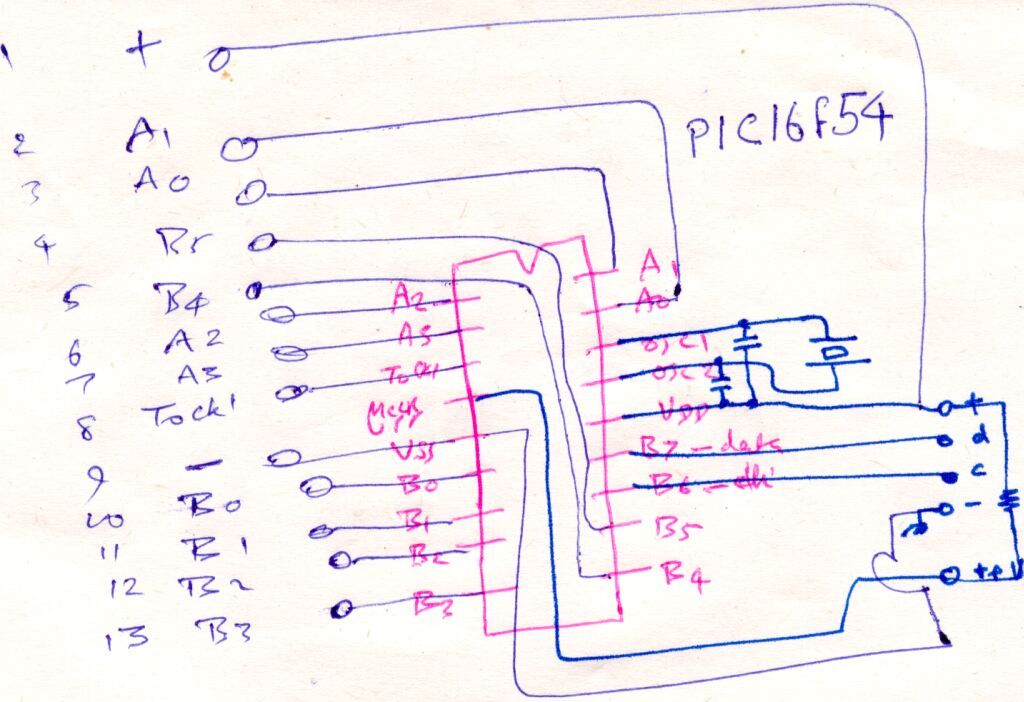
    The Saltwater Etch Process: This is a one-off process to produce one printed circuit board by removing unwanted copper by electrolysis in a saltwater solution.I shall illustrate the process by etching and building a board for 18-pin PIC (for the PC16F54, but any 18 pin PIC wil…


    Here is a pic of my board.

    Leave a comment:


  • joecoin
    replied
    Here is an alternative method:


    I have not tried this myself.

    Leave a comment:


  • ANDREAS
    replied
    ?

    Hi all
    Look http://techref.massmind.org/techref/pcb/etch/c84-st.htm
    or use google key "printing pcb inkjet"
    with this method is not essential use photosensitive boards, acid e.t.c. Only simple board and one inkjet
    sorry for my bad English, but now I think you understand me
    regards

    Leave a comment:


  • Fred
    replied
    Attention, iron method works only with photocopiers and laser printers, not inkjet!
    regards,
    Fred.

    Leave a comment:


  • Carl-NC
    replied
    I've had great results with the Press-n-Peel Blue iron-on method. Very fine lines, very clean results.

    Leave a comment:

Working...
X